More detail, more time
Curves, gentle slopes, text, and small upright details may look smoother. More layers increase print time and create more opportunities for an error.
Layer height affects visible detail, print time, geometry, strength, and reliability—it is not simply a quality setting.
The same rounded example is shown with progressively thicker layers. Look at the upper curve, where stair-stepping becomes easiest to see.
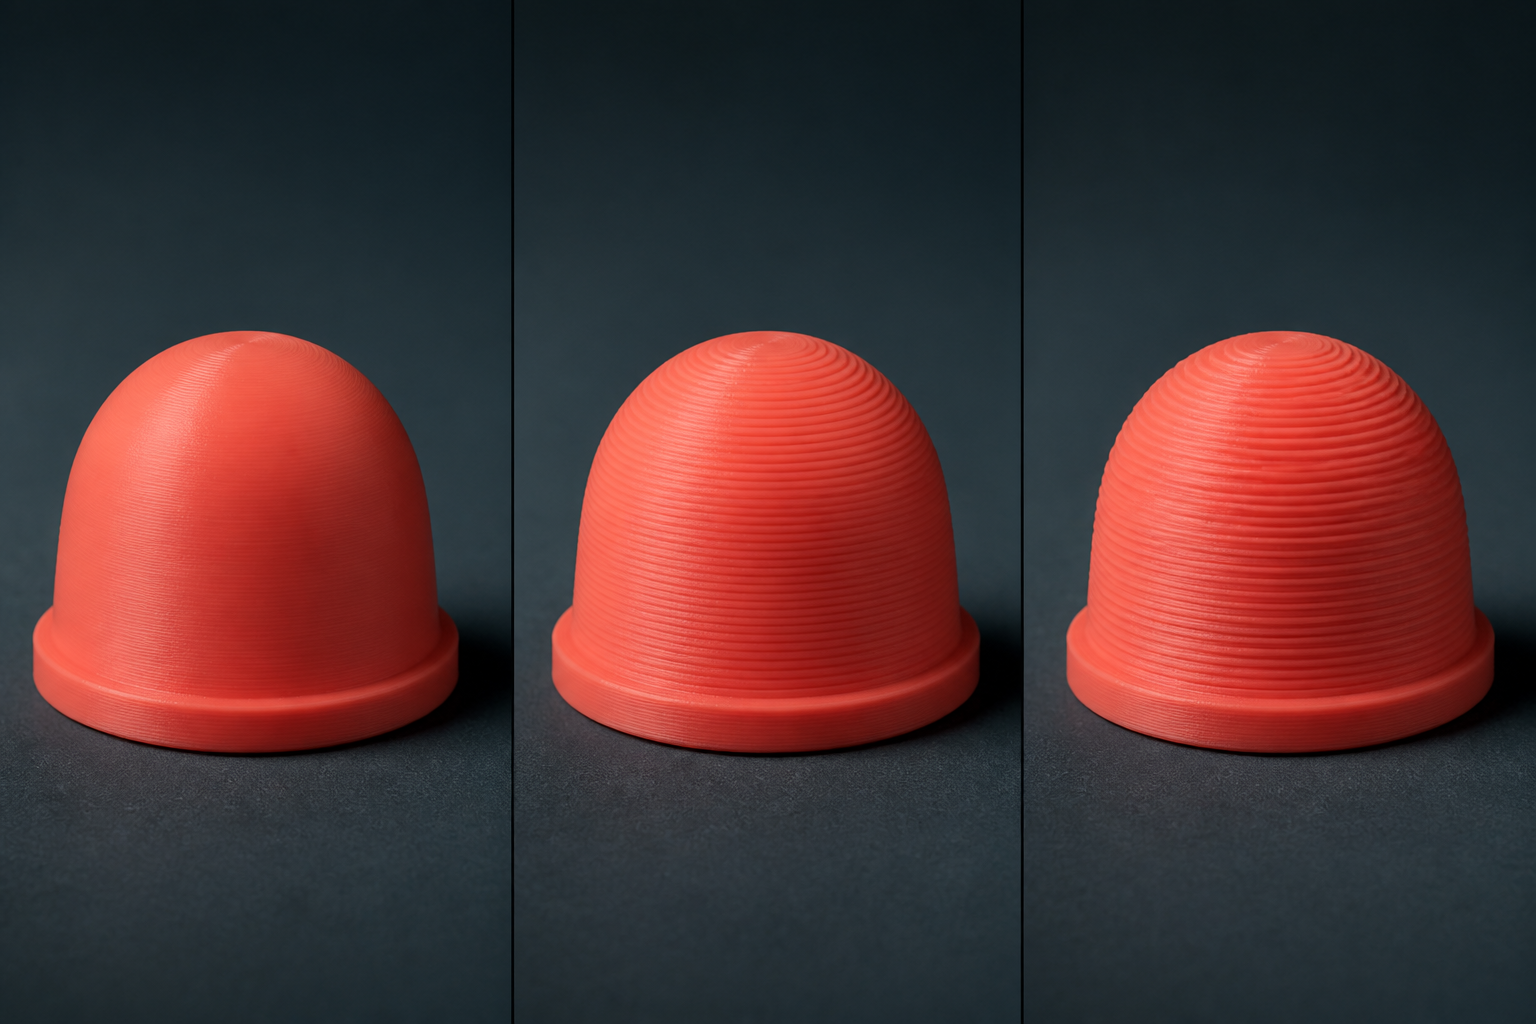
Compact educational illustration. The exact surface produced by these values depends on nozzle size, model shape, filament, cooling, speed, and printer calibration.
Curves, gentle slopes, text, and small upright details may look smoother. More layers increase print time and create more opportunities for an error.
Using fewer layers can shorten the print. Layer lines may be easier to see, small details may soften, and overhangs or top surfaces may print differently.
Layer height changes the shape and bonding of each extruded line. Print orientation, nozzle temperature, flow ratio, cooling, top thickness, and nozzle size still affect the result.
Keep the printer, filament, and orientation the same. Compare estimated time, small details, overhangs, top surfaces, and required filament flow. Test print when the effect is uncertain.
Thinner layers can reduce how far each new line extends beyond the layer below, but cooling, speed, filament type, and geometry still matter.
These features are separate from the model’s normal layers. Review their own height, spacing, and removal settings after changing the print profile.
Vase mode prints one continuous outer wall. Layer height changes the curve detail, print time, and the shape of that single spiral path. Open the full Vase Prints lesson →